Wednesday, December 31, 2014

Spanish Sparks....A History of Frustration


I have a very mixed history with Bultaco ignition systems. My first Bultaco was one of the original 100cc Lobitos. I was able to start it with the kick starter for about two weeks. After that I stopped even trying...I just paddled it down the street until it fired. A little frustrating and more than a little embarrassing. I was expecting my new (to me) Campera to treat me the same. Sure enough it stopped starting.

I really can not say that the stock system was at fault. It may well have been that the Mikuni suffered some sort of failure, but I was determined not to have to worry about sparks again. If I have to ultrasonically clean a carburetor, or re-jet it, or adjust the idle....fine. I just don't want to be worrying about whether or not I am fixing the system which is at fault. It is reassuring to know that the ignition system is working. I was never sure with the stock system.

The solution came in the form of a German system from Powerdynamo. It is a beautifully made system which can include an AC power source for a rudimentary lighting system. I got the system that had the 2kg rotor. There is a lighter rotor for the Pursangs. It is not a particularly inexpensive solution (about 289 Euros including a puller) but it is the only option for the older 4 speed Bultacos.

The installation was very straight forward. You just remove the old points system which lies behind the flywheel and replace it with the Powerdynamo stator. As can be seen, it is a beautiful piece. Five wires lead from the stator. Three go to the coil and two go to the AC regulator. Very high quality wires and insulation where the wires exit the case. You would be hard pressed to screw up this part of the installation.

The rotor, on the other hand presents some interesting challenges. The instructions that come with this unit indicate that you will not be using the woodruff key that locates the Bultaco flywheel/rotor. when you install the Powerdynamo rotor. Interesting....so how do you time this thing?

Etched on the outer face of the rotor is a thin black line. Again, according to the instructions, when this line crosses the blue mark on the stator, ignition ensues. There are two problems. First and most obviously, there are two blue marks on the stator. Take a look at the picture below. There is a very prominent blue dot on the mounting plate, and then a somewhat fainter mark on the gold plate just to the left of the windings which generate the spark. Which one to use? I elected to use the obvious dot.


The second problem is that the rotor is somewhat difficult to attach to the crank at exactly the place you have selected. Assuming that you have used your dial gauge to locate the optimum point where you think that ignition should occur, the challenge is to place the rotor on the crank at that exact point and then tighten it down without disturbing its location. Trust me...this is not easy. The magnets on the rotor want to move the rotor around, and when you attempt to tighten it down...again, things start moving around. If you invest in this unit, be sure to buy the puller. You will have multiple opportunities to use it.


After multiple installations I was finally able to set the timing at about 2.5mmBTDC. I also got after the Mikuni carburetor with my new ultrasonic cleaner....and, just to be on the safe side, I mixed-up some new pre-mix. Success at last! It fired up literally with the first kick. I have gone out on several rides in the 10+ mile range and it runs perfectly. How cool is that?

The next challenge with this system is to create a lighting system...not so I can go out riding at night, but just in case. Even here in Mexico you are required to have a working stop light. My longer term goal is to participate in the occasional giro and  I know that these events require a street legal motorcycle.

The next project for this bike is to install and tune the Wassell carburetor that I just picked up from Hitchcocks. It is pre-jetted for a 175cc BSA Bantam so I am expecting it to be pretty close. I picked-up this unit for purely esthetic reasons. The adapter that I have to use to fit the Mikuni to the Bultaco is unsightly and there is virtually no room left for an air cleaner. With the Wassell carburetor I can bolt it directly to the Bultaco manifold (2" center to center mount) and the original Bultaco air cleaner screws directly to the carburetor body. Wish me luck! 


Thursday, December 11, 2014

Once Again....Apart


You know...a two stroke engine is blindingly simple. No pushrods, no valve shims, no camshafts, no complicated chain or gear drives to the camshaft, no valves, no oil pumps, no oilways to get clogged up, etc....You would think that this unit could have been rebuilt with little drama. Unfortunately, in my case that was not to be.

It turns out the the "carburateur diabolique" was not the problem. My first assumption was that the carburetor (which spelling should I use??) was simply not working. I got an overhaul kit from TY Trials and an ultrasonic cleaning unit. The overhaul of the carb was uncomplicated and both purchases made good sense. Unfortunately when the newly overhauled (and very clean) carburetor was installed it made no difference whatsoever. Still...wild revving at almost any throttle setting and complete chaos when the choke was pulled out. However, I did notice a strong blast of air on the left side of the engine case in the vicinity of the cylinder base gasket....which also sent me down the wrong road.

I pulled the cylinder off and installed a new base gasket and sealant and a new head gasket. I assumed that there was an air leak somewhere at the base of the cylinder. Again, frustration. The wild revving continued.

Next,  I pulled the cylinder off again expecting to find a cracked cylinder or a crack in the case somewhere. No obvious problems could be seen, but I did notice an excessive amount  of dark and heavy oil in the transfer ports. That is when the light finally went on in my head. The seals on the crankshaft had failed. On the drive side, the seal failed and it was pulling in both air and oil. On the magneto side, the failure of that seal was pulling in pure air. The leak on the magneto side explained the air movement on the left side of the case. Air was being drawn in at the opening which was provided for the wires from the magneto.

The fault finding is easy. I am the problem. On the magneto side, it appears that I installed the seal backwards. Hard to believe, but that seems to have been the problem. May be I started drinking too early that day. May be the light was insufficient. May be I was distracted. May be I was in too great of a hurry, whatever the reason the fact is that when when I pulled off the rotor, the little springs which hold the seal tight against the crank were free from the seal and wrapped around the rotor itself. On the drive side, it appears that the seal was damaged during installation. I do remember that both seals were aftermarket pieces that had come with the bearings. They were very difficult to install. It appeared that they may have been slightly oversize. I have ordered new Yamaha OEM seals from John Crane at TY Trials.


Above is a shot of the drive side main bearing seal. This is not the seal that failed. Actually the design of the on this side of the crank employs three different seals which, if properly installed, will provide a comprehensive seal. There is a double lipped seal mounted in the crankcase and that seal rests on a sleeve which fits tightly on the crank and which has a further seal between itself and the crank. I must have made a mess of this seal when I put the cases together. I can see now, working with these seals on the bench that it is not an easy job. The sleeve which goes over the crank case must be installed in a way which will allow the lips of the crankcase seal to fit tightly over the sleeve without folding under. I will be more careful next time.

Stay tuned....new seals will be arriving from England in the near future. I will get this engine together!


Saturday, November 29, 2014

Bultaco Art-Look At What You Find When You Are Cleaning!


This particular piece of industrial art appeared to me while I was performing some long overdue maintenance on my Bultaco Campera. Art really is wherever you find it. Sr. Bulto and his designers created some pieces which go well beyond what was required or needed. Other pieces, not so much, but beauty can be found through these bikes.

I had been riding the bike around the beaches and muddy flats around my home. Dirt and mud and a  mixture of sand and salt had created an exceedingly ugly coating on the front end of the bike. Maintenance had been delayed by more interesting projects, i.e. the TLR and the TY.

Luckily a lull presented itself while I was waiting for pieces to be delivered for the TY. It was an opportunity to refresh the Bully.


This is what the fork looked like before I began cleaning and polishing. It looked a lot worse than it really was. It was just a matter of applying a wire brush to the worst of it and then some sandpaper and then some metal polish...Simichrome...a German product. The fender and the fender brackets received the same treatment. And, by the way, I can see the downtube...it's on the list.


This is obviously another shot of the front hub. If you have an older bike do yourself a favor and look at the pieces closely. You will find some beautiful pieces on your old bike. Look around...you will be surprised.


Tuesday, November 18, 2014

TLR Exhaust Up-Date

 A month or so ago, I spent some time on this blog whining about the unsuitability of a couple of aftermarket downpipes which I had picked-up for the TLR. My complaint was that they did not fit.

As usual, especially with things mechanical, I was wrong. The fault was mine. After I had installed the WES system (which I had been using for several years) with the stock down pipe I went for several rides and a couple of weeks ago, I decided to give it another go...just to see if the new down pipe would work.

In fact the Delkevic Down Pipe installed perfectly. It has a little mounting point on the side to which a guard could be mounted. I have not seen anything which might work, but then again I have not really checked out their website. May be one of those little guards that are seen on older Triumph up pipes would work....We will see.

Just a note on the performance of the bike. It is working perfectly. The lower gearing makes it easier to get the front end up in the air to get over ledges, and the new rear Dunlop Trials tire makes a noticeable difference in rocks and deep sand. Given the problems that I have had with the TY, it is comforting to be able to go to the garage and know that I can go for a ride anytime I want....Thank you Soichiro Honda. The bike may be a little heavy, but it starts and runs every time.


Le Carburateur Diabolique...


The TY has been a source of significant frustration over the past couple of weeks. As you can see, the bike is finished, but essentially unrideable unrideable. The more perceptive among you will notice the lack of a chain, but that is not the problem.


The real problem is the carburetor. It is possessed. When I stuck the bike in the back of my garage (10+ years ago) it had multiple problems. One of the problems was that it would only run at hysterically high revs. It would not idle and it was not very interested in starting. Those same problems exist.

First I suspected a massive air leak into the cylinder. So... I removed the cylinder and applied a seal to the base gasket. I also went through the intake manifold/reed cage assembly and again I checked for leaks, and/or torn rubber in the manifold and then I applied a sealant to the gaskets and reassembled.  After all of this, there was no change...hysterical revving persisted so I disassembled the carburetor and cleaned out the idle jet and the main jet. Both appeared to be free from obstructions. I started it up again, but no change...hysterical revving persisted...something was clearly wrong, and it appeared to be beyond my limited skills.

I'm going after this problem on two fronts. First, I have a spare Chinese Mikuni carburetor which I initially picked-up off of eBay for my Bultaco Campera. Dimensionally it is identical to the Mikuni which is presently fitted to the TY (it is the original carb that came on the bike). This carburetor will be installed if my rebuild of the stock carburetor does not help. The rebuild of the stock carburetor will begin just as soon as I get the gasket/seal set from  TY Trials and my new ultrasonic cleaner. I am going to figure out this carburetor.

On a happier note, I have solved the kick-start problem, the new gas tap works perfectly and the Electrixworld ignition appears to work as advertised.

So...I am going to learn how to rebuild and properly clean my carburetor, and if I am just too thick to get that done, I will install a new carburetor. One way or another I am going to ride this bike. It is way to beautiful to set quietly in the garage.


Saturday, October 18, 2014

The TLR is Done!


Finally, I pushed this project through! It took at least two full days to finish it up..check everything several times and then go for a little ride. This last stage was not without its problems.

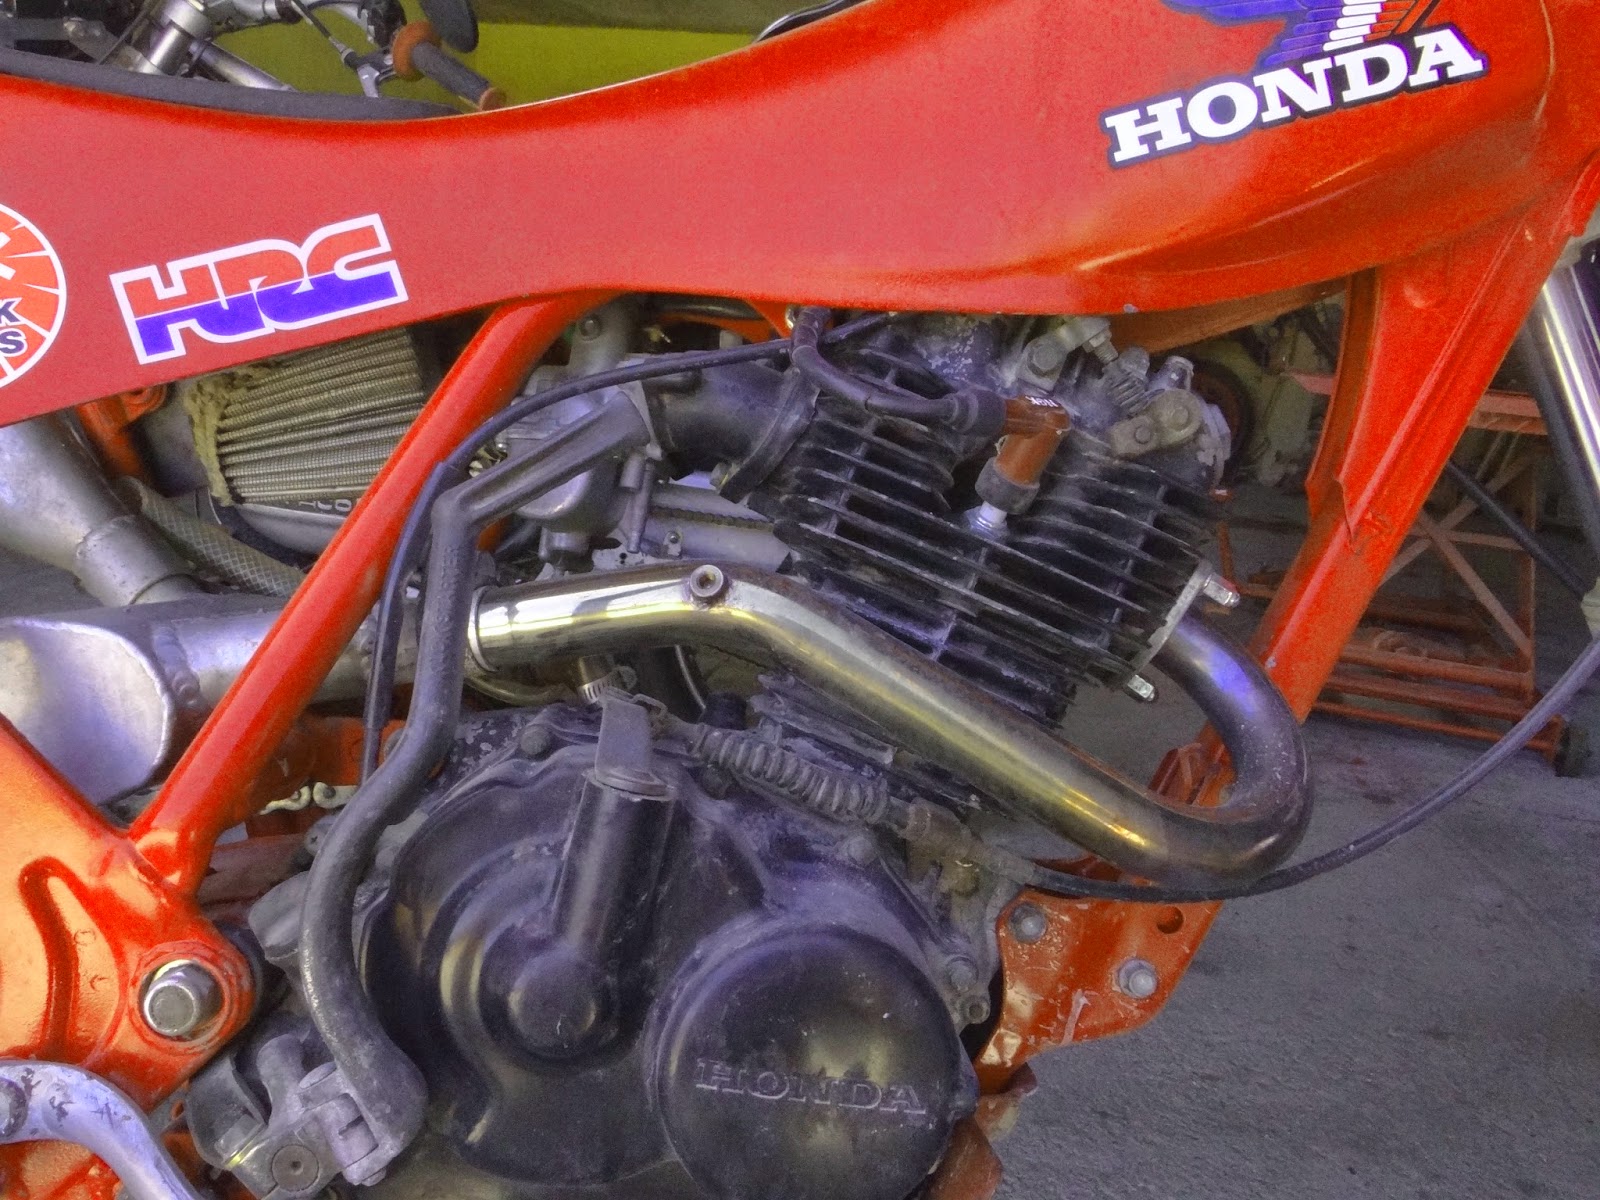
First and most disappointingly I was unable to use either of the stainless headers that I had bought from two separate sources. First was the relatively inexpensive unit made somewhere in the East (either India or Thailand). The second unit was more expensive and better finished. Unfortunately neither unit would fit. As you can see my TLR has the WES system which, by the way, fits perfectly with the OEM Honda unit. So...if either of these suppliers had made a faithful copy of the OEM header, it would also fit perfectly. Unfortunately, that was beyond their expertise and so I am left with the scruffy OEM header. I was really hoping to replace it with a nice shiny stainless piece.

The seat/tank unit was also an issue. The original gas tap which came directly from the original Reflex tank was starting to leak and so I again went to eBay looking for a replacement. Again I ended up in the Thailand section where I found a replacement. When I went to install the gas tap, the tank was already on the bike. Then I threaded the new tap on and began to tighten. With no really good point of reference I managed to start tightening before the tap was exactly on straight. In short, I cross threaded it...and continued tightening until I had buggered at least three threads.

My first line of attack was to use my die set to try and clean up the threads. That turned out to be impossible because there really was not enough clearance between the tank and the feed pipe for the die to sit perfectly on the buggered threads. So I choose to cut off the buggered threads....again, not easy. A hacksaw would not fit in that area and so I ended up using the hacksaw blade by hand. It took a while. The next problem with this "fix" was the fact that the hand made cut had to be at 90 degrees to the feed pipe or the tap would not seat fully. Yea, what are the chances of that happening? As you might expect, the cut was not at 90 degrees and so I had to use a file to get it as close as possible and then I made a thin rubber gasket to take up any slack. It is now leak free.

Mounting a new tire is always a pleasure. Actually mounting this Dunlop trials tire was less troublesome than most. The carcass is more flexible than most tires and the higher profile of the tire allows me, more easily,to get my hand inside the tire to situate the tube and the rim lock.


Naturally, there was a new chain and sprocket set. I went one tooth down in the front and two teeth larger in the rear as well as one size stronger (plus o-rings) on the chain.  Lowering the gearing on this bike seems to be a standard improvement made by the trials community. In my case I am not sure that the lower gearing will not be off-set by the larger and heavier tire. We will see.

To suit the stronger/wider chain the sprocket is somewhat thicker. Since the original sprocket is held to the hub with a snap ring I expected that there might be problems....but I also remembered that the original rear sprocket had a spacer behind the sprocket facing the hub. So it all made sense. I simply installed the sprocket without the spacer and it aligned perfectly with the groove for the snap ring. Obviously Honda uses this hub for a model that employes this larger (thicker) sprocket.

Yes, I know that this drive chain is significant overkill. "Real" trials guys would never use o-ring chains, and they might even go down a size on the drive chain. In my case, I managed to break the stock chain in deep sand which left me with a five mile hike in my riding gear to get home. I really do not want to repeat that experience.


The improvements made to the bike were primarily cosmetic. Any performance improvements would be related to the new tire and gearing combination. The seat/tank unit was painted. A seat pad was also installed. This pad came with the seat/tank unit but I had never glued it down because I knew that I would only have to rip it off when/if I painted the seat/tank unit. New bars and grips were installed. New fenders were installed and virtually all of the fasteners were replaced with stainless nuts and bolts and virtually all of the nuts were of the nylock variety. One major improvement was that every bit of salty/crusty Baja sand and dirt was removed. Corrosion and rust was stopped in its tracks.

The test ride was uneventful. I just wanted to make sure that I had not missed something that was going to cause me great bodily harm. As it turns out, I had apparently tightened every nut and bolt and checked every clearance. Next up will be a longer ride to my favorite places to see if the change to the gearing will have any useful effect.

As a point of reference, below is a shot of the TLR before this project was initiated. Don't bother to click on the picture. It is a low resolution picture that I created for some forum...probably Trials Australia...which requires a lower resolution photograph for their threads.


Here in the workshop my next project will be to complete the TY. Below is a shot of it in its current condition...really not much more to do. It needed a base gasket (which I now have). That's what caused me to shift gears and complete the Honda. All that's really left is to install the cylinder and head, exhaust system, carb, air cleaner and the ignition system. The seat is with our upholstery guy who is making new covers for our cushions in the patio which were wiped out in the hurricane. A bunch of new pieces have arrived for the kick start mechanism, but I am not going to install the new pieces until/unless the unit again fails. The TY could be finished in a day. I am anxious to see how much better a bike the TY is as compared to the TLR. It has been a long time...probably ten years...since I rode the TY.


Watch this space!!!

Monday, September 29, 2014

There was this storm.......


Two weeks ago, we were hit by this monster. We only got our internet and electricity back yesterday. Apparently the wind speeds in La Paz (where we live) were 125mph+. Our home has a palapa roof (palms) and there was some damage from the wind and the rain (6") Most of the news coverage in the United States was focused on the resort city of Cabo San Lucas. We live about 100 miles north of Cabo San Lucas and we got the same storm. It went directly north through Baja.

Luckily for me, but not so luckily for him, my son and his girlfriend arrived in La Paz the day before the hurricane arrived. The intention was to spend a week riding dirt bikes and generally catching up on things. It ended up being a week of cleaning up and scrounging around our stricken city for ice and food. Believe me, if you find yourself in a disaster area there is absolutely nothing more useful than a couple of 29 year olds who love to help. They will be back in a couple on months to have that vacation they had in mind.


Prior to the storm, this is as far as I had gotten on the project bikes. The TLR really just needs to be reassembled and the TY just needs the top end stuck on. My plan was to get these last few tasks accomplished with my son during his visit. The Hurricane blew up that plan. Nevertheless progress has been made. As far as I know I have all the parts on hand to finish the bikes and figure out if they will start and run. The seat/tank units on both bikes look good and the alloy fender on the Honda is just what I was hoping for. I finally figured out that I could attach the alloy fender to the tupperware fender which was already in place.


As the followers of this blog might remember, the point of building two bikes simultaneously was so that when my son came down to visit we would have two new bikes to shake down. I had a bit of a deadline, i.e. September 13. The cool thing about a self-imposed deadline is that nothing really happens if you miss it. In my case I just rationalized that it might be more fun to complete the bikes together. That did not work out. We ended up cleaning up after a hurricane....which was, in and of itself a bonding experience. Well, now I've got a new deadline....sometime in December/January or February when he will come back with some friends to go riding. Wish me luck.