Saturday, August 9, 2014
The Paint on the TY is Done!!!
Yesterday I put two more clear coats on the seat/tank unit. About a week ago I finished the yellow paint and I was able to look at my choices for the decals. These decals, which are actually for a YZ from the 70's, looked best. They are similar to the decals that came on the unit from Sammy Miller…only a little more aggressive. Later today or tomorrow I should be able to put the entire chassis together and see what it looks like with the alloy fenders.
As you can see in the background, work is moving forward on the TLR. It now has several coats of primer and paint on the seat/tank unit, but the frame is untouched. The frame needs to be comprehensively cleaned and then some primer on the parts of the frame that have been rubbed down to bare metal.
I also get to chase around to the autoparts stores and/or the radiator shops to find some radiator hose for the WES exhaust. There are two joints that I want to cover with hose….and I get to have my old seat reupholstered by a local shop. In this part of the project I am lucky. Reupholstery shops are plentiful, cheap and the work is excellect. Adios for now, the next pictures will be of a complete chassis.
Friday, August 1, 2014
The TLR Comes Apart...
Over the past couple of days, weather permitting, I have been working on the TLR to get it to a point where I can give it a good cleaning, re-paint the frame and bodywork, and replace the more vulnerable fasteners with stainless. The humidity and the salty soil is causing a great deal of corrosion on the fasteners associated with the frame. Work has been slowed by the extreme humidity and heat. The temperature in my garage was 102 degrees when I shot the above picture.
Today the engine came out...but not without a fight. The engine is a tight fit in this chassis. I have no idea how I am going to get the clean engine back into the newly painted chassis without tearing up a lot of the new paintwork.
Now, I have a new problem. I need to take the chassis apart...wheels, forks, shocks, and swingarm all need to come off for cleaning and paint. How am I going to support the frame in order to remove these components? I woulod like to put it on a simple aluminum stand, but that's not an option. I am open to suggestions. Hanging it from the rafters seems like a good idea, but I do not have any rafters. The roof of the garage is cememnt. What do you TLR guys do???
The TLR...
May be it is a good idea to begin the TLR before the TY is done, may be not. What I am trying to do is complete both bikes before the first week of September when my son is coming down for a few days. It seems doable if I can stay focused. If I can not keep up, neither bike will be done. So, let's see what happens.
The TLR 200 is more than just a TLR. It is a Reflex which was originally imported into the United States. As you Honda guys know, this means that the engine was virtually unusable because of the strangled carburation and the chassis was burdened with a battery which was actually carried like a saddlebag on the right hand side of the bike. Excess weight was everywhere. After I bought the bike I did the basics to turn it into a useful trail bike. The very first thing that I did was to re-wire the thing to eliminate the lighting system, turn signals, battery, and instruments. Secondly, I mounted a seat/tank unit from B & J Racing a supplier in the United States. Next, I got some new shocks and handlebars and a WES exhaust from the same supplier. These changes helped, but the bike was not really transformed until I mounted a Chinese copy Keihin carburetor. The Chinese Keihin made all the difference...actually the carburetor made more difference than anything else that I did to the bike.
This time the TLR is just going to get a cosmetic overhaul. All of the mechanical bits are working as well as can be expected for a trail bike. But being used constantly in the salty environment of the beaches here in La Paz has taken its toll. There is an unacceptable amount of rust around the lower frame and the swing arm, and the paint is disappearing at an alarming rate. As you can see in the photo above, the seat/tank unit has never been painted, and it has a nice crack on the rearmost edge from me sitting there when I got too tired to keep up the trials posture. I hope to mount alloy fenders front and rear, but mounting a rear alloy fender has its challenges. We will see.
As of this moment, the seat/tank unit is on the work bench being cleaned-up after the repairs to the rear lip. Later today, I expect to apply the first coat of primer.
Tuesday, July 22, 2014
Paint is going on...
I have not been posting much recently about the TY. I have been making progress, but the problem is that once I get into the garage I just tend to get to work instead of taking pictures and documenting what's happening. So, here's an up-date.
Painting the frame with a touch-up gun is difficult, messy and wasteful. In the future, especially if I am somewhere near a shop that can sandblast and powercoat I will go in that direction. This frame has numerous nooks and crannies which are virtually impossible to reach with a spray gun. Naturally the overspray goes everywhere. There is a lot of wasted material. Finally, in frustration I got a couple of rattlecans to finish the job. Otherwise many small tabs and mounts were not going to be adequately covered. Today I applies a couple of coats of clear to try to bring out a bit of a shine. It looks successful on the main tubes.
I have to keep reminding myself that this is a trials bike...a bit of a gentleman's trials bike..but still a trials bike. It will get very dirty and it will spend more than a little time on its side in the dirt. No sense in going crazy on the cosmetics.
The tank was significantly easier. The touch-up gun hold enough paint for two coats. So far the tank has about four coats and has only had a tiny bit of sanding in between the coats. I ordered a couple of set of decals off of ebay today which are supposed to be suitable for a middle 70's YZ...in other words, bumble bee stripes.
Once I have figured out the decals I will clear coat them. While waiting for the decals, I will check and double check the assembly of the engine and install it into the frame...then the suspension and the wheels and I will be done. Can't wait!
Just some routine maintenance...
As I mentioned in an earlier post, the old Amal has been switched for a Chinese Mikuni. Subsequently, I've attached a foam filter to keep the worst of the grime out of the carb. Now, with the new carb in place, I am riding the bike a lot more. It is nice to just sit in the saddle and explore the Baja beaches, as opposed to my usual stand-up stance on the trials bikes.
The experience is really improved by the fact that the bike now idles...what a treat, and it is significantly faster and cleaner on the top end. Anyhow, from the beginning there has been a steady and very low volume leak from the primary case, nothing unusual for a Bultaco and actually it is comforting because it means that there is oil in the primary case. I had been adding smallish amounts of oil before each ride to insure that everything was well lubricated in there, but it was time to change the oil and conduct a little inspection.
I have to say that it is a real treat to work on a bike that has been properly looked after. The seven allen head bolts which hold the primary side cover to the case were in perfect condition. They all had washers, and they were tightened to the correct torque. Not crazy tight...but tight enough. The primary case gasket was in place and it had not been coated with gasket cement so it could be reused. And, none of the threads in the center case were stripped.
300 cc of fresh 10wt. oil and I was done. The filler plug was undamaged and the drain plug was, likewise, in perfect shape. After a quick wipe-down I was off for a short ride around the neighborhood.
Friday, July 11, 2014
Trial Fit on a Trials Bike....
The frame has been given a couple of coats of primer. I am still not happy with the look of some of the joints so there is probably some additional grinding to be done. However, this was a convenient point to trial fit the WES exhaust and the rear fender. It went together very nicely.
The various bits and pieces of the exhaust system are made of fairly soft (but thick) aluminum and so I was able to bash the required clearance in the muffler where it passes close to the shock mount and the expansion chamber itself need a few hardy whacks to clear the frame. To my eye, it appears that the muffler will just clear the rear tire at full travel.
Next I have to go to the biggest auto parts store in La Paz and see if they will let me play in their radiator hose section behind the counter. I need a piece to connect the header pipe to the expansion chamber and another piece to connect the expansion chamber to the muffler. Both of these joints are a nice tight push fit, but I want the added security of a nice rubber joint to keep the drool and vibration to a minimum. Besides, all those rubber joints remind me of my Bultacos (both in the present and the past).
This trial fit was also an opportunity to create the reinforcing rivets and aluminum sheet for the rear fender. I'll post some pictures after I have had an opportunity to grind and file a bit. Right now it looks a little rough.
Friday, July 4, 2014
A (Chinese) Mikuni for the Bultaco
As I mentioned some time ago, my 175 Campera came with a very old Amal carburetor. It really was not interested in idling and acceleration usually brought forth a lot of stumbling which took a while to clear. It started well from cold, but was entirely disinterested in starting when warm. Apparently this set-up was originally intended for a Mercurio which had a 25% larger displacement. I love the bike but the Amal was in the way.
Solutions are available. In this case I simply did an ebay search for carburetors for a DT 175 Yamaha and this little beauty turned up. The results naturally included genuine Mikuni's which were priced in the $100+ range. This one was $26.00 plus shipping. I bought two with the thought that I might want to use the second one for my TY 175. I have to admit that the machining is not up to the standard of a Japanese Mikuni and the general fit and finish is clearly one step below the original.
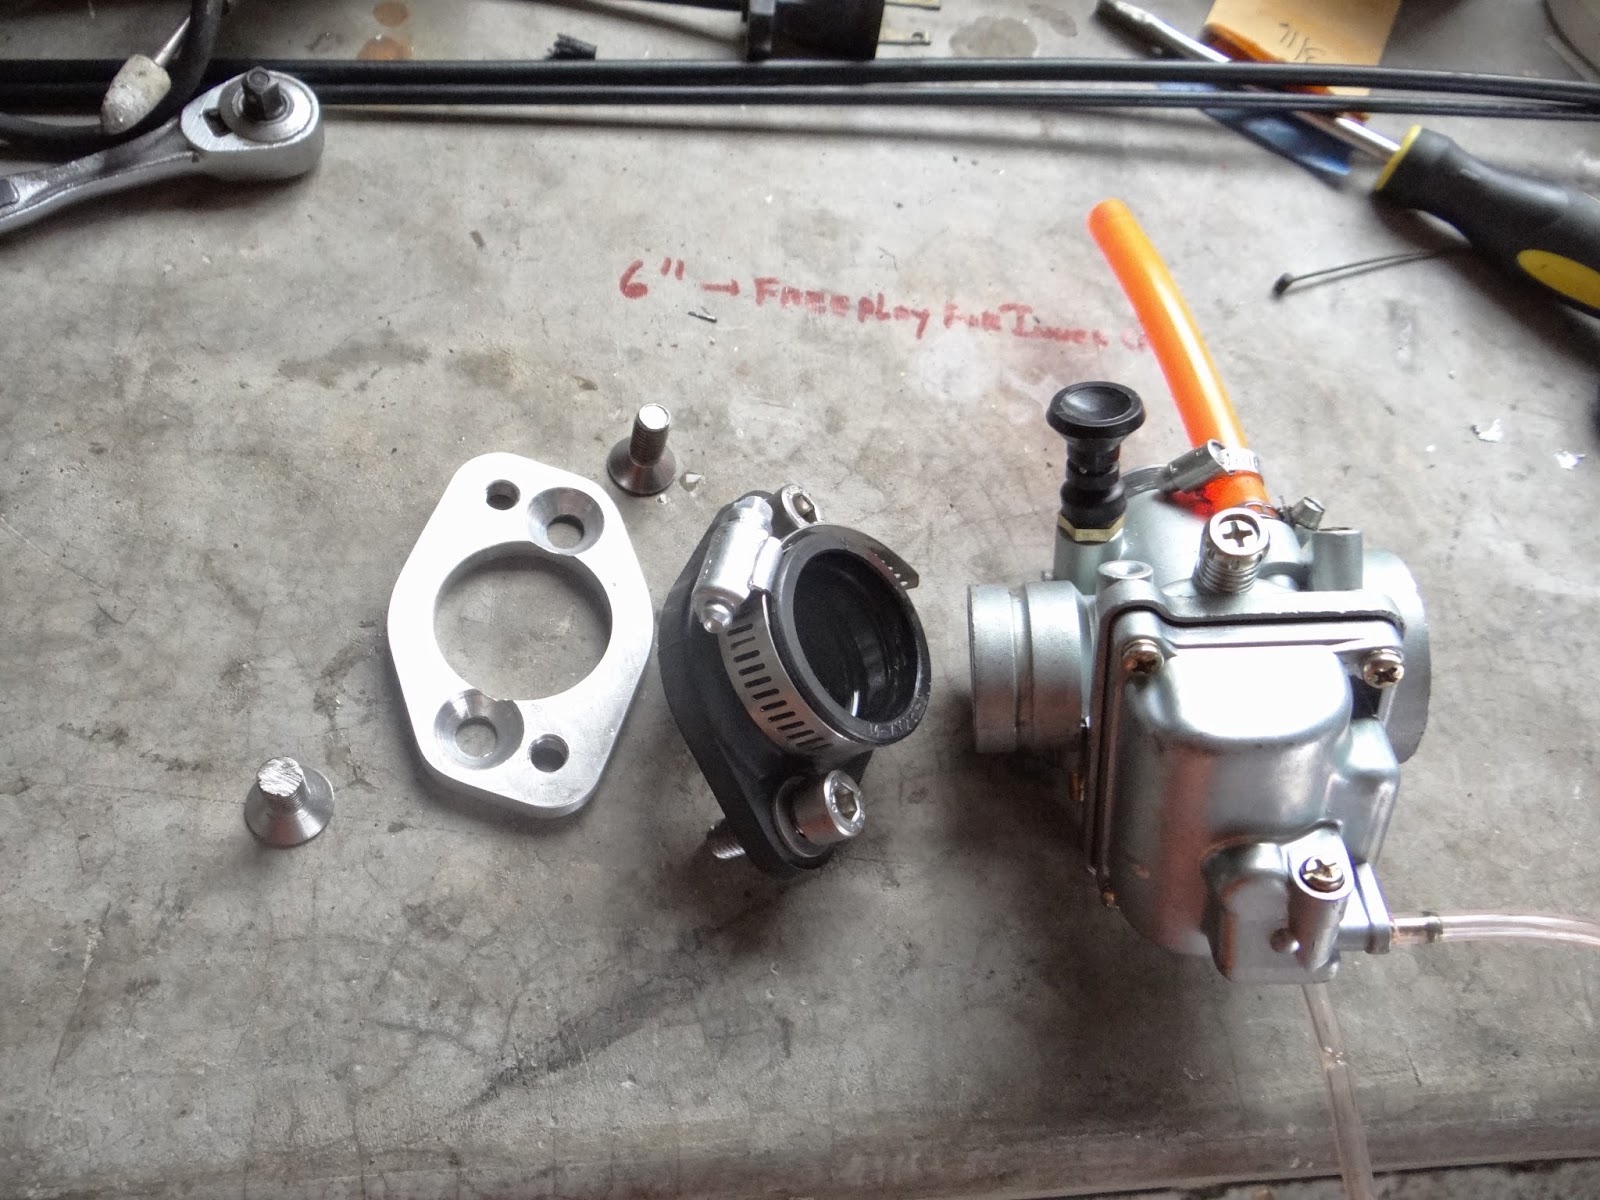
Mounting this carburetor to the Bultaco really was not a big deal once I figured out where to get the right pieces. There are lots of rubber mounts available to fit a Mikuni carburetor to the Amal mounts, but they are sized for the larger Mikuni's. These rubber mounts are obviously intended for the larger British Twins and Singles. The mount this carburetor to this smaller bike I had to source pieces from Speed and Sport which is a United States supplier. I would expect that these similar pieces would be available in either the UK or Australia. Below is a photo of the pieces necessary.
I had to source the nuts to make it all work. I needed two M8X1.25 machine screws to attach the alloy adapter plate to the original manifold and then two more M8X1.25 socket head bolts to attach the rubber adapter to the alloy plate. Not overly complicated if you can figure out where to get the pieces.
One last complication with this carburetor is the longish cable guide which comes out of the top of the carburetor and is intended to guide the cable into the body. This guide is threaded but it has no mount for the throttle cable itself. If you have a lot of old carburetors around you may have a receiver for the cable guide, otherwise you are back on ebay trying to find the right words to do a search.
The final hurdle is the throttle cable itself. The cable guide is unusually long and so you will probably need to shorten the outer throttle cable a couple of inches, or you will have to make your own. In my case I got a throttle cable kit from Venthill (which is UK based, but has a U.S. distributor) and made my own. Making your own throttle cable is not easy. It is not something that can be done with a hacksaw. These cables are incredibly strong and will only yield to something mounted on a Dremel tool. One more word of advice, do not ever solder in your bare feet. Don't ask.
The carburetor completely transforms the bike. It idles, apparently forever...even on the sidestand. It accelerates cleanly and returns promptly to idle when you release the throttle. Unfortunately, it is not interested in starting...either cold or hot...so I have some work to do. Right now, I just have to squirt a little starting fluid into the carburetor and away it goes. I'll keep you informed.
Subscribe to:
Posts (Atom)